 September-15-2012
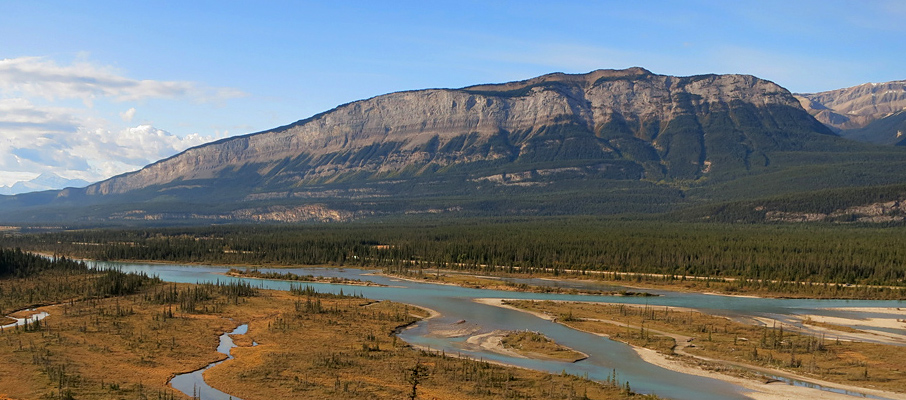
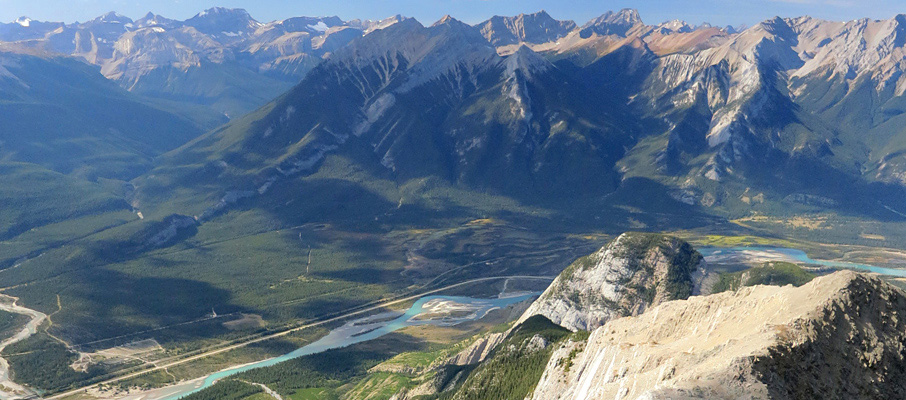
 While technically the hardest of the "Kane" scrambles in Jasper National Park, Hawk Mountain is really a test of one's endurance, requiring a lot of travel and a shocking amount of elevation gain (1,575m, well over 5,000 ft.) for a relatively low peak. However, those that can handle it will enjoy an incredible ridgewalk overlooking the Athabasca River Valley before arriving at an excellent vantage point to survey the classic alpine climbing route on nearby Mt. Colin.
I successfully completed the ascent of Hawk Mountain with my friend Vicki on a warm, and pleasantly sunny day in September.
Trip Information
The scrambling route on Hawk Mountain is accessed from the well-maintained Overlander Trail which follows the eastern shores of the Athabasca River near the Town of Jasper. Look for the trailhead on the Yellowhead (Hwy 16) next to a bridge crossing the Athabasca River roughly 19km north of the Town of Jasper, or 23km southwest of the Miette Road turnoff. There's an obvious parking area next to the road.
Climb the slope from the parking area and begin following the main trail southwest for a few kilometres past Morro Peak. After crossing an outlet creek from the deep canyon between Morro Peak and Hawk Mountain, look for a flagged trail heading upwards to your left (east) (see images #4 and #5). This trail leads up and across part of Hawk Mountain before reaching the crux section.
The crux is a 3m tall chimney that provides good holds until you near the top (see image #9-#11), where it transitions to a sloped slab with few good holds. I recall using my legs to power myself up a bit and then sort of fumbling the last metre or so to where I could stand up again. A little awkward, but not anywhere near as difficult as Vicki or I expected. That said, I could see downclimbing into the chimney being a lot more difficult without decent handholds being available.
Note that you can bypass this chimney to the climber's right. However, I've noticed that many other reports talk of following a narrow ledge well out over the western face of the mountain to the right. Not only is this dangerously exposed, but it's also completely unnecessary. You can bypass the chimney making use of ledges and holds within a couple metres to its right. Vicki and I downclimbed this bypass quite easily on our return (see images #50 and 51).
From the crux the trail continues to climb steeply along a very exposed shelf. I found that the vast majority of the exposure along this section could be easily avoided by purposely taking a high line on the shelf (which seemed to have parallel trails, low/high, for most of its length). This section eventually breaks through a weakness in the cliff band above and leads you the first ridge top.
This ridge will soon lead you to a long slabby ramp that, if you miss the trail turn-off to the climber's left around the midway point, will eventually lead you to a nice, south-facing lookout. If you reach that lookout and aren't sure where to go, just backtrack along the ramp and look for a trail headed through the trees on the skier's right.
This part of the trail weaves through trees and a series of small rock bands before following a narrow ledge along the western face of the mountain (see image #16). Pay careful attention here as you're looking for a highly concealed turnoff to the left (east) which leads through a weakness in the cliff band. The trail continues merrily past this turnoff and, when it began to descend the western face, I got paranoid, backtracked and then found the path. Vicki and I built a rock arrow to help mark the entry (see image #17), but that may not have survived for long.
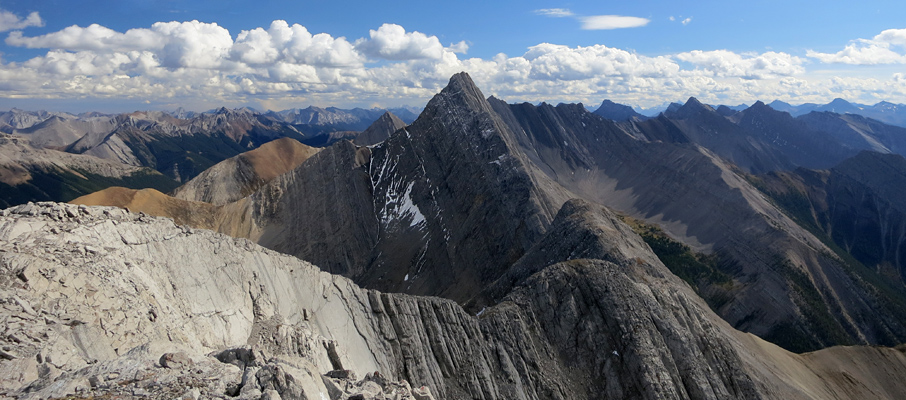
Once you've gained the ridge beyond this cliff band you'll now be faced with an epically long ridgewalk to the summit with an ridiculously evil number of false summits. Seriously, don't even utter the words “we're almost there”, or “I think we're close” until you have the impressive north face of Mt. Colin filling your eyeballs. While there is some scrambling and routefinding required at spots along the ridge, the challenge here is one of morale, not of climbing or navigation.
Take plenty of time to enjoy the summit views because the return route retraces every step, and there's a long way to go.
Further Reading
Alan Kane provides detailed route information in Scrambles in the Canadian Rockies (page 320).


")

 and Hawk (right)")


")
")


")


")


")


 and Snaring Campground Area")


